Delving into best microphone for youtube, this article aims to provide an in-depth look at the types of microphones suitable for creating high-quality audio content on the platform, including the differences between dynamic, condenser, and USB microphones, as well as the pros and cons of each.
The article will also discuss popular microphones for high-quality audio, key features to consider when choosing a microphone, and how to connect and set up a microphone for youtube.
Types of Microphones Suitable for YouTube

When it comes to selecting the right microphone for YouTube, there are several factors to consider, including the type of microphone, its quality, and its compatibility with different devices. In this section, we will focus on the three main types of microphones suitable for YouTube: dynamic, condenser, and USB microphones.
### Dynamic Microphones
Dynamic Microphones
Dynamic microphones are a popular choice for YouTube creators due to their durability and ability to handle high sound pressure levels. They are often used for recording loud sounds, such as drums and guitar amplifiers.
- Pros:
- Cons:
+ Durable and can handle high sound pressure levels
+ Resistant to humidity and extreme temperatures
+ Inexpensive compared to condenser microphones
+ May not capture high-frequency details
+ Can be prone to plosive sounds (e.g., “p” and “t” sounds)
+ May require a separate amplifier
Some popular dynamic microphones for YouTube include the Shure SM58 and the Sennheiser MD421.
### Condenser Microphones
Condenser Microphones
Condenser microphones are known for their high-quality sound and ability to capture a wide range of frequencies. They are often used for recording vocals, acoustic instruments, and other high-fidelity audio sources.
- Pros:
- Cons:
+ Can capture high-frequency details
+ Often used for high-fidelity audio recording
+ Can be used for a variety of applications, including YouTube recording
+ May be more sensitive to noise and reverberation
+ Can be prone to electromagnetic interference (EMI)
+ Often require a separate power source and preamp
Some popular condenser microphones for YouTube include the Blue Yeti and the Rode NT1-A.
### USB Microphones
USB Microphones
USB microphones have become increasingly popular in recent years due to their ease of use and plug-and-play convenience. They can connect directly to a computer via USB and often have built-in preamps and gain adjustment.
- Pros:
- Cons:
+ Easy to use and plug-and-play friendly
+ Often have built-in preamps and gain adjustment
+ Can be used with a variety of devices, including smartphones and tablets
+ May have higher latency compared to analog microphones
+ Can be prone to noise and distortion
+ Often have lower sound quality compared to analog microphones
Some popular USB microphones for YouTube include the Blue Yeti and the Rode NT-USB.
When choosing a microphone for YouTube, it’s essential to consider the type of content you’re creating, the quality of your audio, and the ease of use.
Note that the information provided above highlights key aspects of each microphone type, as well as their strengths and weaknesses. By understanding these differences, you can make an informed decision about which type of microphone is best suited for your YouTube recording needs.
Popular Microphones for High-Quality Audio
When it comes to recording high-quality audio for YouTube, investing in a good microphone is essential. A decent microphone can make a significant difference in the overall sound quality of your videos, making them more engaging and professional-looking. In this section, we’ll explore some of the top-ranked microphones suitable for YouTube.
Blue Yeti – A Popular Choice Among YouTubers
The Blue Yeti is a popular choice among YouTubers due to its versatility and high-quality audio. This microphone is a condenser-type USB microphone that offers multiple pickup patterns, including cardioid, bidirectional, and omnidirectional. It’s compatible with both Mac and PC and features a built-in headphone jack for monitoring audio. The Yeti also has a mute button and a volume knob for easy control.
- The Blue Yeti offers excellent sound quality with a frequency range of 20Hz to 20kHz.
- It has multiple pickup patterns to suit different recording situations.
- The microphone is durable and built to last, with a metal construction and a weighted base for stability.
- It’s plug-and-play, making it easy to use and set up.
Rode NT-USB – A Studio-Quality Mic for Home Recordings
The Rode NT-USB is a studio-quality microphone designed for home recordings. It’s a condenser-type USB microphone that features a large diaphragm and a high-quality preamp. The NT-USB provides a warm and natural sound with a frequency range of 20Hz to 20kHz. It’s also equipped with a built-in headphone jack and a mute button for easy control.
HyperX QuadCast Gaming Microphone – A Great Option for Podcasters
The HyperX QuadCast is a USB microphone designed specifically for gaming and podcasting. It features a condenser-type pickup pattern and a built-in pop filter to reduce plosive sounds. The QuadCast also has a mute button and a volume knob for easy control. It’s a great option for podcasters who want high-quality audio without breaking the bank.
Key Features to Consider When Choosing a Microphone
When selecting a microphone for YouTube, it’s essential to consider several key features that will ensure optimal audio quality. A good microphone can make a significant difference in the overall sound of your videos, so it’s worth taking the time to research and understand these critical features.
One of the most crucial factors to consider is the frequency response of the microphone. Frequency response refers to the range of frequencies that the microphone can pick up and reproduce. A good microphone should have a flat frequency response, meaning it can accurately capture all the frequencies, from the lowest bass notes to the highest treble notes. This is essential for producing high-quality audio that sounds natural and accurate.
Frequency Response
A flat frequency response is critical for accurate sound reproduction. A microphone with a narrow frequency response may pick up only a specific range of frequencies, resulting in an unbalanced and unnatural sound. For example, a microphone that only picks up frequencies above 5 kHz may sound overly bright and tinny, while a microphone that only picks up frequencies below 200 Hz may sound muddy and flat.
Impedance
Impedance is another critical factor to consider when choosing a microphone. Impedance refers to the resistance that the microphone presents to the audio signal. A microphone with low impedance is easier to connect to a preamp or audio interface, while a microphone with high impedance may require a transformer or other impedance-matching device to function correctly. Most modern microphones have a low impedance of around 200-600 ohms, making them easy to connect to most audio equipment.
Gain Adjustments
Gain adjustments refer to the ability to adjust the level of the audio signal that the microphone sends to the preamp or audio interface. A microphone with adjustable gain allows you to customize the level of the signal to suit your specific needs. This is particularly useful for loud or quiet sources, as well as for different mic types, such as dynamic or condenser microphones.
Noise Floor and Self-Noise
The noise floor and self-noise of a microphone refer to the level of background noise or hiss that the microphone picks up. A good microphone should have a low noise floor and self-noise, meaning it can accurately capture the desired sound without introducing unwanted background noise.
Polar Pattern
The polar pattern of a microphone refers to the way it picks up sound from different directions. Different polar patterns are suited for different applications, such as recording vocals, instruments, or ambiance. Common polar patterns include omnidirectional, cardioid, and hypercardioid.
Sensitivity
Sensitivity refers to the level of output signal that the microphone produces for a given input signal. A microphone with high sensitivity will produce a stronger output signal than one with low sensitivity, making it easier to connect to a preamp or audio interface.
Connectivity Options
Finally, consider the connectivity options of the microphone. Does it have multiple connections, such as XLR and USB? Does it require an external power source, or is it battery-powered? Understanding the connectivity options will help you choose a microphone that can easily integrate with your existing audio equipment.
a good microphone is not just about the hardware, but also about the user’s technique and experience.
Connecting and Setting Up a Microphone for YouTube
When it comes to high-quality audio for your YouTube videos, selecting the right microphone is just the first step. Properly connecting and setting up your microphone is equally important to ensure optimal audio performance. In this section, we will guide you through the different connection types and provide detailed instructions on how to set up your microphone for YouTube.
XLR Connection Type
XLR connections are commonly used in studio settings and professional applications. This connection type requires a separate audio interface to convert analog audio signals to digital signals that can be processed by your computer or recording device. To connect an XLR microphone, you will need an XLR cable, an audio interface, and a power source.
- Connect one end of the XLR cable to the microphone’s XLR output and the other end to the audio interface’s XLR input.
- Power on the audio interface and connect it to your computer or recording device using a USB cable.
- Set the audio interface to the correct input and gain settings according to the manufacturer’s instructions.
USB Connection Type
USB connections are widely used in home recording and live streaming applications. Many microphones, such as USB microphones, can plug directly into your computer or recording device via a USB cable. To set up a USB microphone:
- Connect the microphone to your computer or recording device using a USB cable.
- Install any necessary drivers or software provided by the manufacturer to ensure proper communication between the microphone and your device.
- Set the microphone to the correct input and gain settings according to the manufacturer’s instructions.
3.5mm Connection Type
3.5mm connections are commonly used in consumer electronics and portable devices. This connection type is often used with dynamic microphones and can be found on audio mixers, recorders, and other equipment. To set up a 3.5mm microphone:
- Connect the microphone to an audio mixer or recorder using a 3.5mm cable.
- Adjust the microphone gain to an optimal level according to the manufacturer’s instructions. Be cautious not to overload the input, as this can result in distortion.
- Check the audio levels on your device to ensure the microphone is capturing the audio signal correctly.
Calibrating and Adjusting Microphone Settings
To ensure optimal audio performance, you should calibrate and adjust your microphone settings according to your recording environment and equipment. Here are a few key settings to pay attention to:
- p Gain: Adjust the gain to the optimal level according to the manufacturer’s instructions. Be cautious not to overload the input, as this can result in distortion.
- Polar Pattern: If your microphone has multiple polar patterns, adjust it to suit your recording environment. Omni-directional microphones capture sound from all directions, while cardioid microphones focus on capturing sound from the front.
- Equalization: Adjust the equalization settings to suit your voice and recording environment. This can help to remove unwanted frequencies and emphasize the desired frequencies.
Adjusting microphone settings requires experimentation and patience. Take the time to listen to the audio and make adjustments accordingly.
Microphone Mounting and Placement Techniques
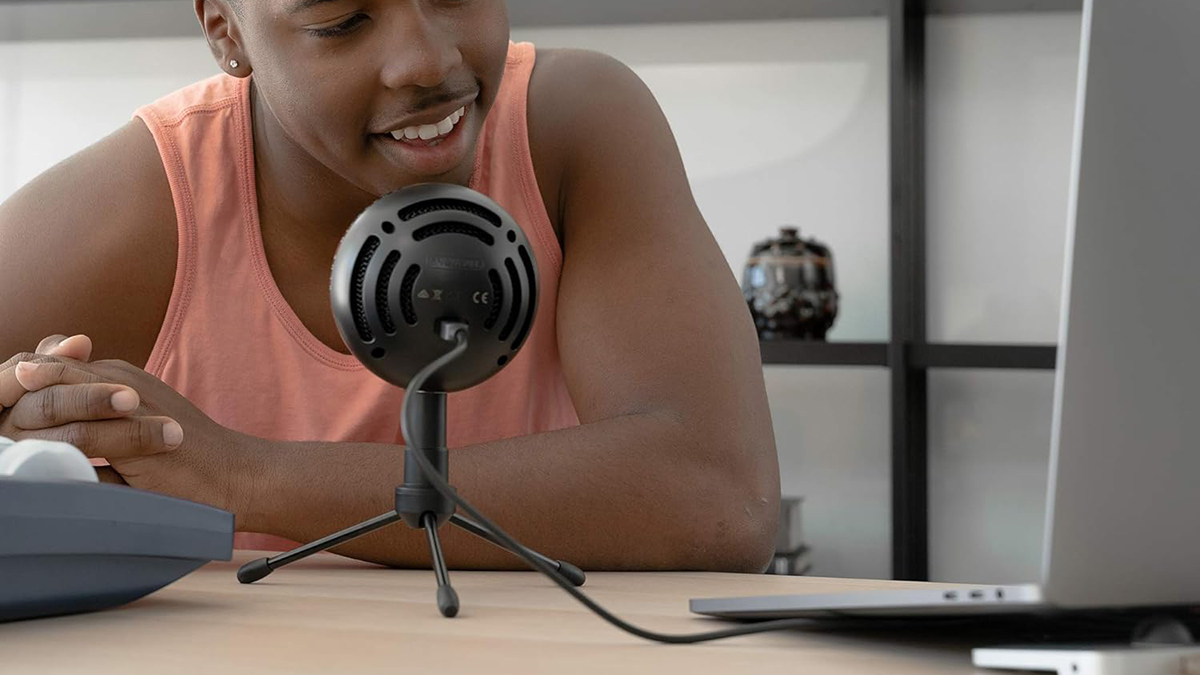
Proper microphone positioning and placement are crucial for achieving high-quality audio in your YouTube videos. A well-placed microphone can pick up clear and crisp sounds, while a poorly placed one can lead to distortion, feedback, and other audio issues. In this section, we’ll discuss the importance of microphone mounting and placement techniques and provide tips for optimal sound quality.
The Importance of Pop Filters
Pop filters are devices that fit over the microphone to reduce plosive sounds (such as “p” and “t”) and prevent distortion. They work by dispersing the air pressure from the sound wave, allowing for a smoother audio signal. Using a pop filter can greatly improve the sound quality of your voice and prevent harsh, clipped sounds. You can purchase a pop filter or make your own using a metal mesh screen and a flexible rod.
Shock Mounts: Reducing Vibrations and Noise
Shock mounts are devices that attach to the microphone stand and help reduce vibrations and noise that can affect the audio quality. They work by isolating the microphone from the stand, preventing any unwanted vibrations or movements that can cause the microphone to pick up unwanted sounds. Using a shock mount can help produce a smoother, more stable audio signal.
Microphone Placement Tips
When placing your microphone, consider the following tips to achieve optimal sound quality:
- Place the microphone 6-8 inches (15-20 cm) from your mouth to capture clear and crisp sounds.
- Adjust the microphone to the correct angle to avoid picking up any sounds from the sides or back.
- Use a shock mount to reduce vibrations and noise.
- Consider using a pop filter to reduce plosive sounds.
- Experiment with different microphone placements to find the optimal position for your voice and the type of audio you’re recording.
Additional Considerations
When choosing a microphone and designing your recording setup, consider the following factors to achieve high-quality audio:
- Acoustic treatment: Consider the acoustics of your recording space and how they may affect the audio quality.
- Background noise: Minimize background noise by using noise-reducing materials, such as acoustic panels or sound-absorbing panels.
- Microphone type: Choose a microphone that suits your recording needs and the type of audio you’re producing.
- Recording software: Use recording software that is compatible with your microphone and capable of producing high-quality audio.
Best Microphones for Specific Use Cases
When it comes to creating high-quality content for YouTube, the microphone you choose is crucial for capturing clear and crisp audio. Depending on the type of content you’re producing, you may need a microphone designed specifically for voice-overs, commentary, or interviews. In this section, we’ll discuss the best microphones for each of these use cases and explain the unique requirements of each.
Best Microphones for Voice-Overs
Voice-overs require a microphone that can capture a high-quality, consistent sound. Here are some of the best microphones for voice-overs:
- The Blue Yeti is a popular choice for voice-overs, known for its clear and accurate sound.
- The Rode NT-USB is another favorite among voice-over artists, offering a warm and natural sound.
- The Sennheiser MKH 416 is a high-end microphone designed for voice-overs and radio broadcasting, offering exceptional sound quality and durability.
- The Audio-Technica AT2020 is a budget-friendly microphone that’s perfect for voice-overs and podcasting.
When choosing a microphone for voice-overs, look for a model with a flat frequency response and a built-in pop filter to reduce plosives and sibilance.
Best Microphones for Commentary
Commentary microphones need to be able to capture a high-energy sound while resisting external noise. Here are some of the best microphones for commentary:
- The Shure SM7B is a classic commentary microphone, known for its clear and articulate sound.
- The Sennheiser e865 is another popular choice, offering a bright and detailed sound.
- The Audio-Technica AT4033 is a high-end microphone designed for commentary and live broadcasting, offering exceptional sound quality and durability.
- The Rode Procaster is a budget-friendly microphone that’s perfect for commentary and podcasting.
When choosing a microphone for commentary, look for a model with a high gain range and a built-in windscreen to reduce wind noise.
Best Microphones for Interviews
Interview microphones need to be able to capture clear and accurate sound while resisting external noise and feedback. Here are some of the best microphones for interviews:
| Microphone | Key Features |
|---|---|
| The Sennheiser MKH 416 | High-end microphone designed for voice-overs and radio broadcasting, offering exceptional sound quality and durability. |
| The Rode NT-USB | Popular choice for voice-overs and interviews, offering a warm and natural sound. |
| The Audio-Technica AT4040 | High-end microphone designed for interviews and live broadcasting, offering exceptional sound quality and durability. |
When choosing a microphone for interviews, look for a model with a high gain range and a built-in pop filter to reduce plosives and sibilance.
Budget-Friendly Options for a Great Microphone
When it comes to setting up a home studio or recording high-quality audio for YouTube, investing in a good microphone is essential. However, high-quality microphones can often come with a hefty price tag, making it difficult for those on a budget to find a good option. Fortunately, there are several budget-friendly microphones on the market that offer great quality without breaking the bank.
Blue Snowball: A Popular Budget-Friendly Option, Best microphone for youtube
The Blue Snowball is a popular and affordable USB microphone that is known for its high-quality sound and compact design. This microphone is perfect for those who want a simple and easy-to-use setup. The Blue Snowball is also plug-and-play, meaning you can connect it directly to your computer via USB and start recording right away.
- Sensitivity: The Blue Snowball has a high sensitivity, allowing it to pick up even the faintest sounds.
- Frequency Response: The Blue Snowball has a frequency response of 40 Hz to 16 kHz, providing a wide range of audio frequencies.
- Mic Capsule: The Blue Snowball uses a condenser capsule to capture high-quality audio.
The Blue Snowball is a great option for beginners or those on a tight budget. It offers high-quality sound and is easy to use, making it a great choice for podcasts, voiceovers, and other applications.
Samson Meteor Mic: Another Budget-Friendly Option
The Samson Meteor Mic is another popular budget-friendly USB microphone that offers high-quality sound and a sleek design. This microphone is perfect for those who want a compact and portable setup. The Samson Meteor Mic is also plug-and-play, making it easy to use and set up.
The Samson Meteor Mic has a frequency response of 20 Hz to 20 kHz, providing a wide range of audio frequencies. It also has a built-in headphone jack, allowing you to monitor your audio in real-time.
- Sensitivity: The Samson Meteor Mic has a high sensitivity, allowing it to pick up even the faintest sounds.
- Frequency Response: The Samson Meteor Mic has a frequency response of 20 Hz to 20 kHz, providing a wide range of audio frequencies.
- Mic Capsule: The Samson Meteor Mic uses a condenser capsule to capture high-quality audio.
The Samson Meteor Mic is a great option for those who want a compact and portable setup. It offers high-quality sound and is easy to use, making it a great choice for podcasts, voiceovers, and other applications.
Rode NT-USB: A Budget-Friendly Option with High-Quality Sound
The Rode NT-USB is a budget-friendly USB microphone that offers high-quality sound and a durable design. This microphone is perfect for those who want a professional-grade sound without the high price tag.
The Rode NT-USB has a frequency response of 20 Hz to 20 kHz, providing a wide range of audio frequencies. It also has a built-in headphone jack, allowing you to monitor your audio in real-time.
- Sensitivity: The Rode NT-USB has a high sensitivity, allowing it to pick up even the faintest sounds.
- Frequency Response: The Rode NT-USB has a frequency response of 20 Hz to 20 kHz, providing a wide range of audio frequencies.
- Mic Capsule: The Rode NT-USB uses a condenser capsule to capture high-quality audio.
The Rode NT-USB is a great option for those who want a professional-grade sound without the high price tag. It offers high-quality sound and is easy to use, making it a great choice for podcasts, voiceovers, and other applications.
Understanding Frequency Response and Microphone Frequency Chart

When it comes to capturing high-quality audio for your YouTube channel, one of the most critical factors is the frequency response of your microphone. The frequency response of a microphone refers to its ability to pick up audio signals across different frequency ranges. A microphone with a flat, smooth frequency response will accurately capture the full range of frequencies, from low rumbles to high-pitched sounds, resulting in clear and natural sound.
Frequency Response and Sound Quality
The frequency response of a microphone has a direct impact on the overall sound quality. A microphone with a narrow frequency response may accentuate certain frequencies, leading to an unbalanced sound. For example, a microphone that emphasizes high frequencies may make your voice sound bright and piercing, while a microphone that emphasizes low frequencies may make your voice sound muffled and heavy. On the other hand, a microphone with a flat frequency response will accurately capture the nuances of your voice, resulting in a clear and natural sound.
Microphone Frequency Chart
Understanding the frequency response of a microphone requires a basic knowledge of audio frequencies. The human ear can perceive sounds within the range of 20 Hz to 20,000 Hz. The frequency range of a microphone can be divided into several bands:
- Low frequencies (20 Hz – 200 Hz): These frequencies are responsible for the low rumble of thunder, the sound of a distant engine, or the vibration of a guitar string. Microphones that emphasize low frequencies are often used for recording music, voice-overs, and video game audio.
- Mid frequencies (200 Hz – 2 kHz): These frequencies are responsible for the sound of a human voice, the rustling of clothes, and the chirping of birds. Microphones that accurately capture mid frequencies are essential for capturing high-quality voice recordings.
- High frequencies (2 kHz – 20 kHz): These frequencies are responsible for the high-pitched sounds of a child’s voice, the ringing of a bell, and the screeching of tires. Microphones that emphasize high frequencies are often used for recording electronic music, percussive instruments, and other high-pitched sounds.
Frequency Response Chart:
| Frequency Range | Description | Microphone Type |
| — | — | — |
| 20 Hz – 200 Hz | Low frequencies, rumble | Dynamic microphones |
| 200 Hz – 2 kHz | Mid frequencies, voice | Condenser microphones |
| 2 kHz – 20 kHz | High frequencies, high-pitched sounds | Ribbon microphones |Note: This is a simplified frequency response chart, and the actual frequency response of a microphone may vary depending on its design and intended use.
Microphones with a flat frequency response, such as the Neumann U87 or the Shure SM7B, are ideal for capturing high-quality voice recordings. These microphones accurately capture the full range of frequencies, resulting in a clear and natural sound.
In conclusion, understanding the frequency response of a microphone is essential for capturing high-quality audio for your YouTube channel. By choosing a microphone with a flat frequency response, you can ensure that your recordings sound clear, natural, and professional.
Creating a Home Recording Studio for YouTube
When it comes to creating high-quality audio content for YouTube, having a dedicated home recording studio is essential. A well-designed studio can help you produce professional-grade sound, save time, and minimize distractions. In this section, we will discuss the essential equipment and design considerations for building an effective home recording studio.
Essential Equipment for a Home Recording Studio
A home recording studio should include the following essential equipment to ensure high-quality audio production:
- A digital audio workstation (DAW) such as Ableton Live, Pro Tools, or Logic Pro X. A DAW is the central software that enables you to record, edit, and mix audio files.
- A high-quality microphone to capture clear and crisp audio. Popular options include the Blue Yeti, Rode NT-USB, and Shure SM7B.
- A monitor speaker system to accurately mix and balance your audio levels. Look for speakers with flat frequency response and minimal coloration.
- A audio interface to connect your microphone to your computer and transmit digital audio signals.
- A pair of headphones to monitor your audio in isolation and catch any potential issues.
Having these essential equipment pieces will provide a solid foundation for creating high-quality audio content.
Design Considerations for a Functional Home Recording Studio
A well-designed home recording studio should prioritize functionality, comfort, and minimal distractions. Consider the following design principles when building your studio:
- Acoustic treatment: Install sound-absorbing materials such as acoustic panels, diffusers, and bass traps to control reverberation and echo.
- Minimal reflections: Position your microphone and speakers to minimize reflections and create a clean audio environment.
- Comfortable working space: Ensure your studio is well-lit, ventilated, and has a comfortable working surface.
- Ergonomic design: Position your equipment to promote good posture and reduce fatigue.
Designing your home recording studio with these considerations in mind will create a space that fosters creativity and productivity.
Additional Tips for an Effective Home Recording Studio
To take your home recording studio to the next level, consider the following additional tips:
- Invest in a shock mount or suspension system to isolate your microphone from vibrations.
- Use a pop filter to reduce plosives and harsh sounds.
- Implement a signal flow diagram to visualize your equipment chain and optimize your workflow.
By incorporating these tips into your home recording studio design, you’ll be well on your way to creating high-quality audio content that exceeds your YouTube viewers’ expectations.
Final Review
In conclusion, finding the best microphone for youtube requires careful consideration of various factors, including the type of microphone, key features, and how to connect and set up the microphone.
By following the guidelines and recommendations Artikeld in this article, you can find the perfect microphone for your youtube channel and take your audio quality to the next level.
Expert Answers: Best Microphone For Youtube
Q: What is the best microphone for voice-overs on youtube?
A: The best microphone for voice-overs on youtube is often a matter of personal preference, but popular options include the Blue Yeti and Rode NT-USB.
Q: How do I choose the right microphone for my youtube channel?
A: When choosing a microphone for your youtube channel, consider factors such as the type of content you’ll be creating, the level of audio quality you need, and your budget.
Q: Can I use a smartphone microphone for youtube?
A: While some smartphone microphones can produce decent audio quality, they are often limited in terms of sound quality and may pick up background noise.
Q: How do I connect my microphone to my youtube setup?
A: The method for connecting your microphone will depend on the type of microphone you have, but common options include USB, XLR, and 3.5mm connections.
Q: What is the difference between a condenser microphone and a dynamic microphone?
A: Condenser microphones are often more sensitive and can pick up a wider range of frequencies, while dynamic microphones are more robust and resistant to distortion.

